 EN
 DE
 RO
Prototyping projects for ideas validated in practice
This page presents real projects in which ideas were taken from concept to a physical, functional or testable form, making them easier to understand before larger investments are made.
Projects across 3 directions: Physical model • Connected prototype • Functional pilot
How the projects are presented
They are not presented as finished products or inflated case studies. Each project shows a real stage of work: the idea explored, what was built, what was tested and what became clearer before the next step.
Project 01 · HVAC · Smart Home · Functional prototype
Modular ventilation system with heat recovery and OpenHAB integration
A functional modular ventilation prototype built to test airflow, filtration, heat transfer, sensors, actuators and control together within a smart home system.
The system consists of modules that can be used independently or coordinated together. Depending on the chosen scenario, the units can operate simultaneously, alternately or based on measured values.
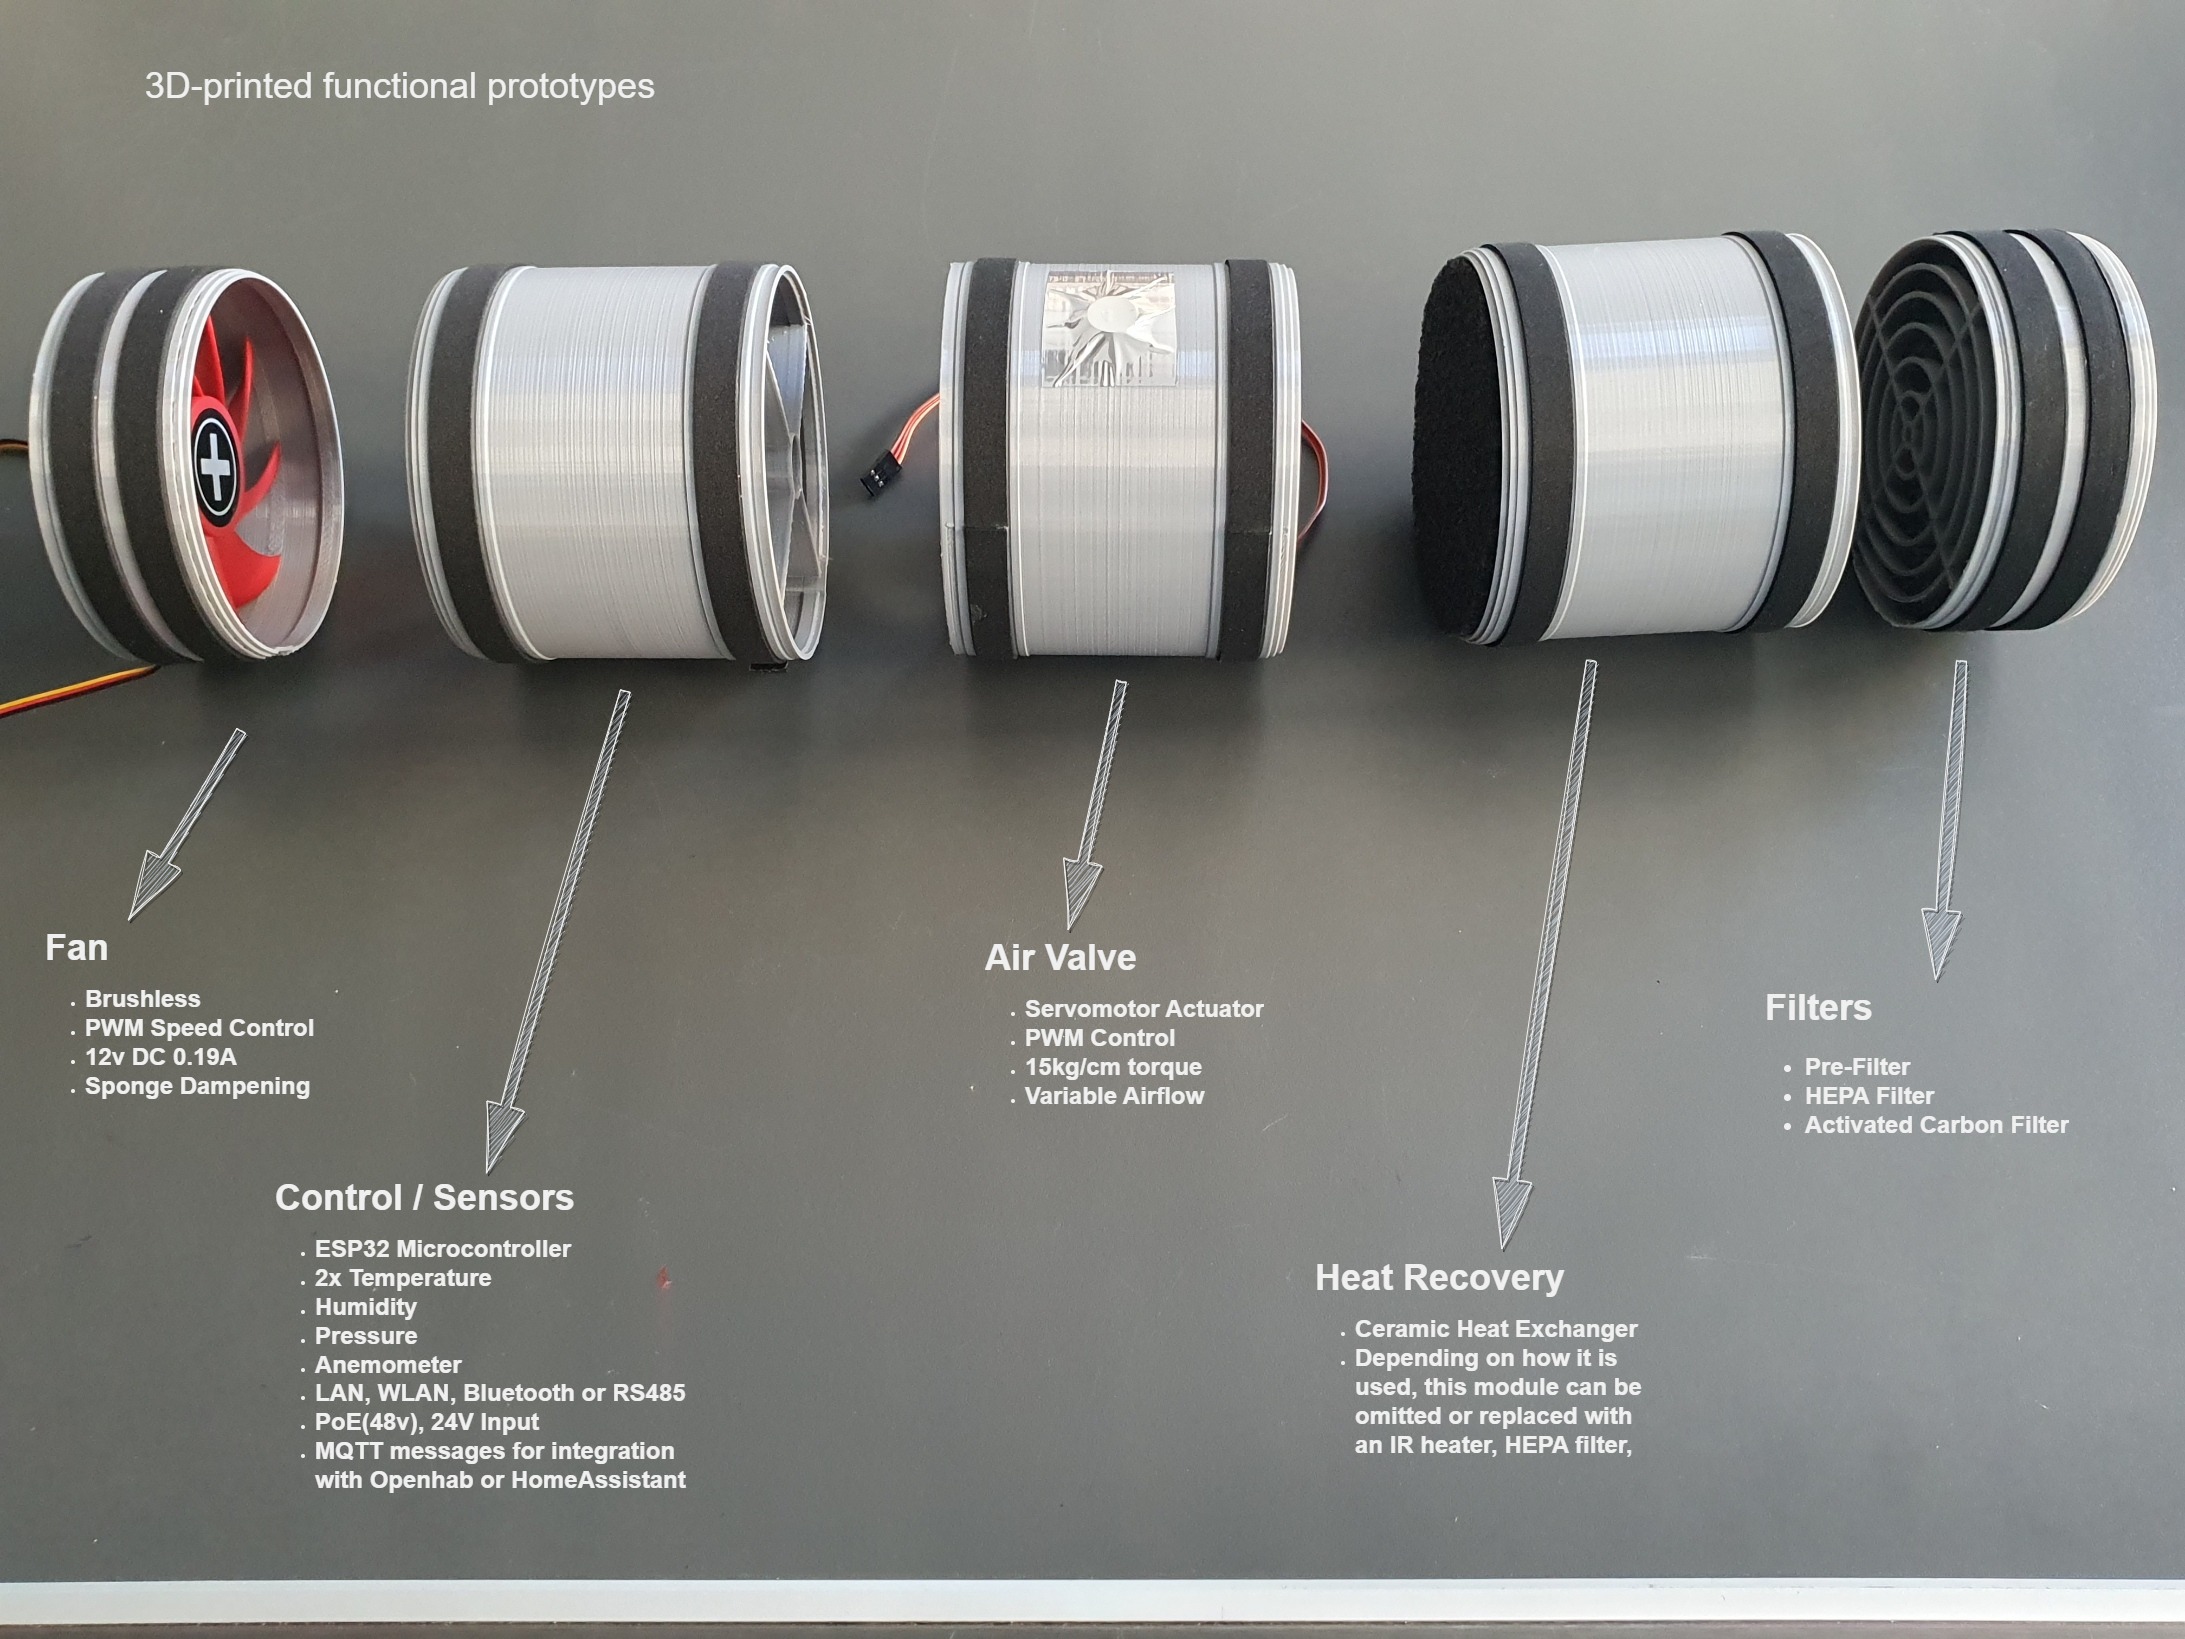
Fan, air damper, filters, ceramic heat exchanger, sensors and electronic control in a modular prototype.
What the prototype includes
- brushless fan with PWM control and variable speed;
- servo-actuated air damper for airflow control;
- pre-filter and activated-carbon filter;
- ceramic element used for heat transfer and heat recovery;
- sensors for temperature, humidity, pressure and airflow velocity;
- ESP32 controller for data acquisition, local logic and actuator control;
- Wi-Fi or Modbus communication, depending on the integration method;
- the ability to coordinate several units within a shared scenario.
The purpose of the project was to verify, in a real system, the connection between mechanics, filtration, measurement, electronic control and smart-home automation, rather than simply build an isolated ventilation unit.
Centralised monitoring and control
Functional integration with OpenHAB
The prototype was integrated into OpenHAB to display measured values and control the main functions. This allows the system to be monitored and controlled as part of a wider automation setup, not only from the local electronics.
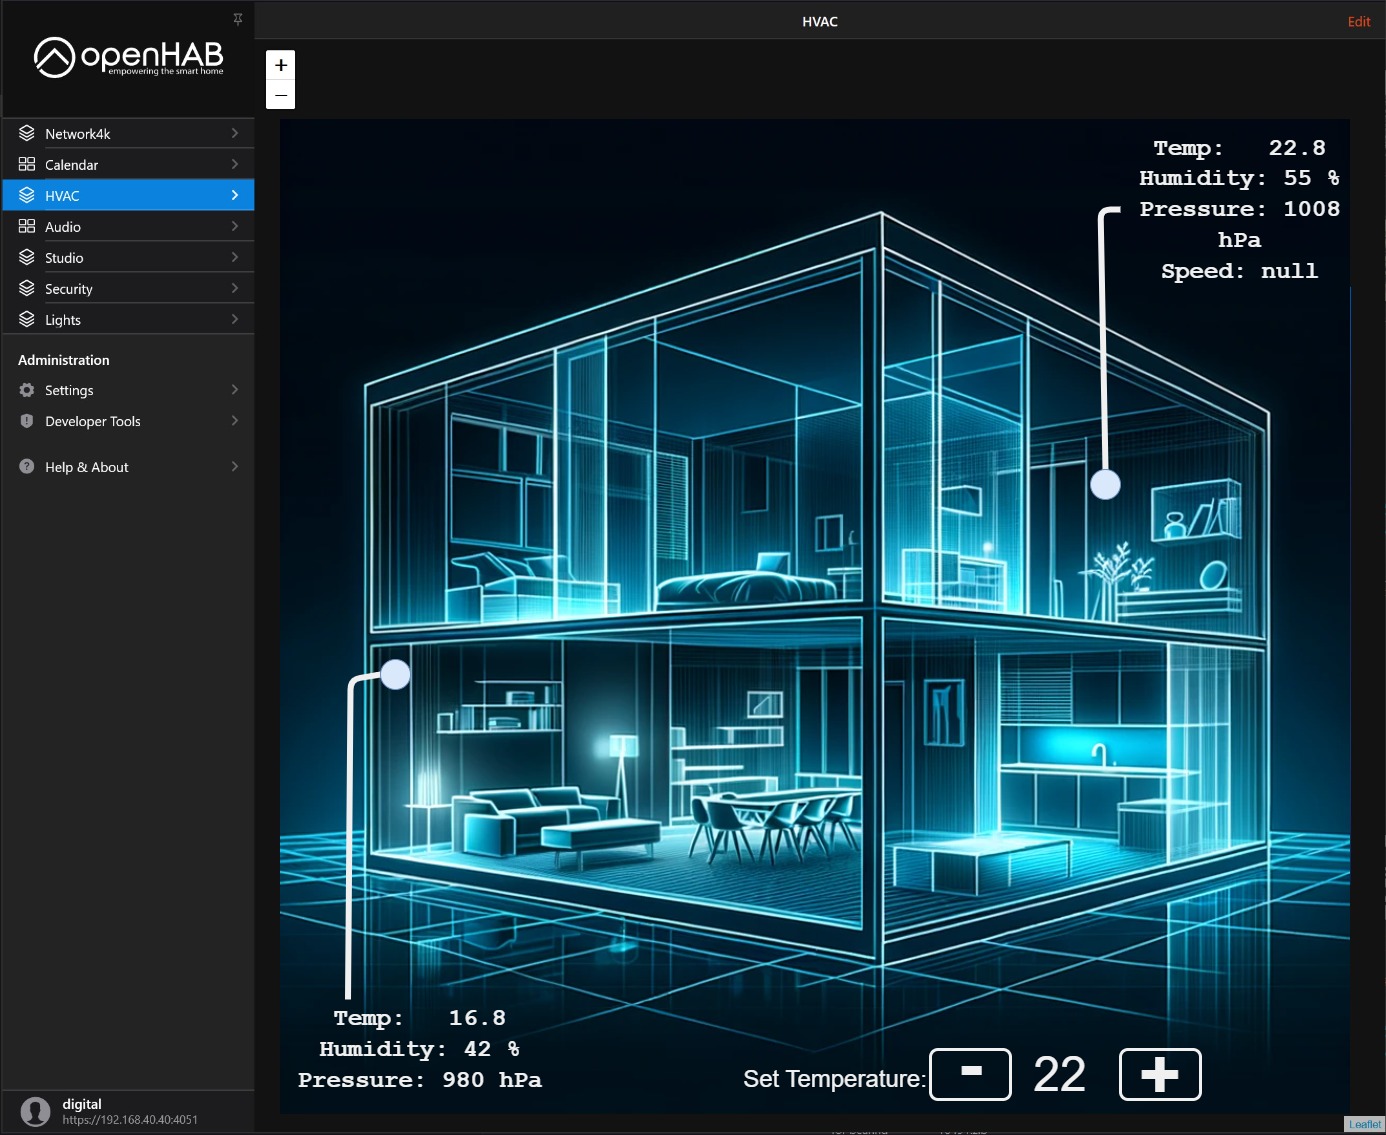
OpenHAB interface for monitoring air parameters and adjusting the operating setpoint.
Functions available through the integration
- displaying temperature, humidity, pressure and other values relevant to operation;
- tracking intake and exhaust air conditions;
- adjusting the temperature setpoint and system behaviour;
- controlling the fan and air damper through manual commands or automation rules;
- operation based on indoor conditions, outdoor conditions or a schedule;
- a foundation for expanding the system with additional modules and smart-home scenarios.
Status: functional prototype with sensors, actuators, local ESP32 control and active OpenHAB integration. Future iterations may focus on optimising airflow, refining the enclosure and expanding the automation rules.
Project 02 · Assistive Technology · Computer Vision · Experimental prototype
Wheelchair control interface through eye tracking
A prototyping exercise focused on translating gaze direction into commands for an electric wheelchair, using miniature cameras, image processing, microcontrollers and a mechanical joystick interface.
The project started from the idea that a person with severely limited mobility could express an intention to move without directly operating the joystick. The system was conceived as a learning and integration prototype, not as a finished device for medical use.
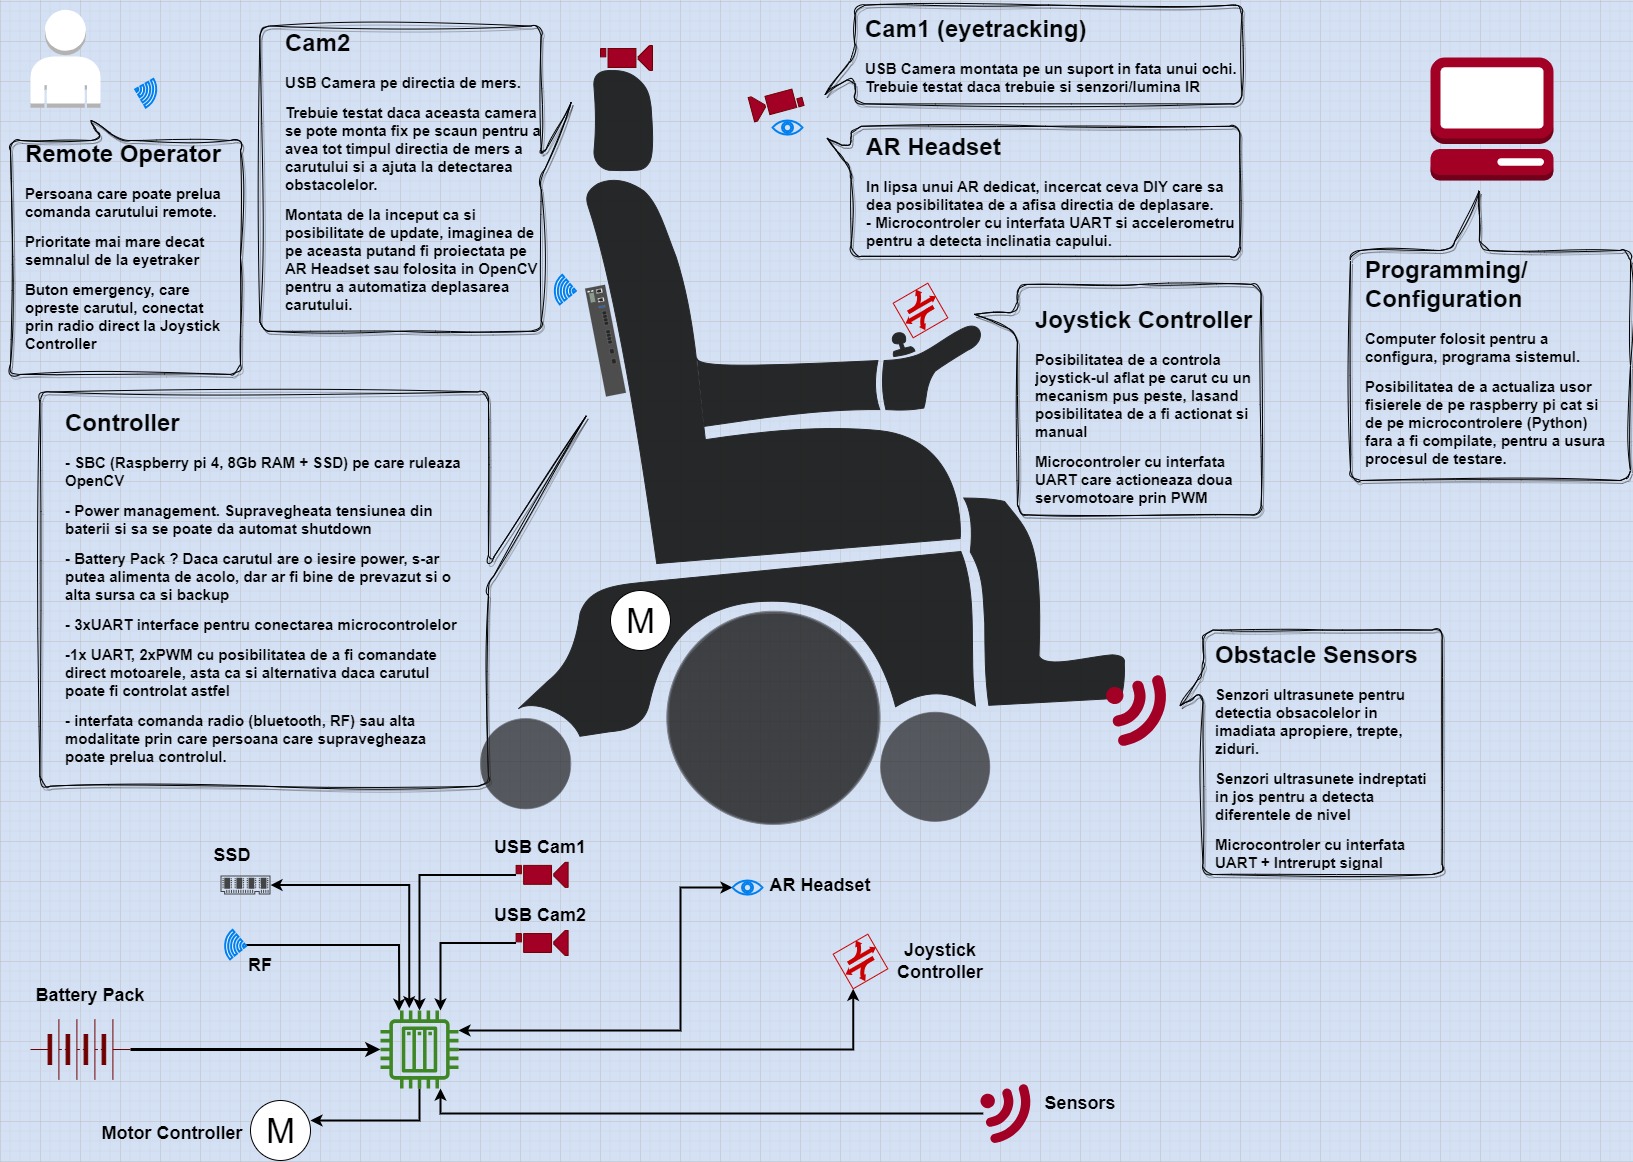
Architecture sketch: eye tracking, OpenCV processing, ESP32-based control, joystick, obstacle sensors and the option for manual control takeover.
How the system was designed
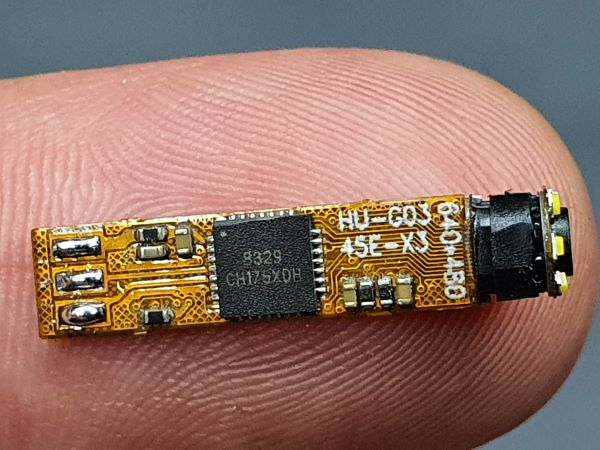
- a miniature USB camera, removed from an inspection camera, was mounted close to the eye for gaze tracking;
- a second camera was planned to face the direction of travel, to observe the path and explore obstacle detection;
- a Raspberry Pi 4 with an SSD ran OpenCV for image capture and interpretation;
- the resulting commands were sent to ESP32 microcontrollers through a serial interface;
- the wheelchair joystick was mechanically actuated using PWM-controlled servomotors, without completely removing the option of manual control;
- the design also included ultrasonic sensors for nearby obstacles or changes in level, such as steps and edges.
In addition to eye-based control, the concept included a radio link for an operator who could take over control, an emergency button and the option of an AR-style interface to display direction or system status.
Physical integration and practical testing
Miniature camera integrated on goggles
The practical challenge was not only image processing, but also physically integrating the camera as close to the eye as possible without making the assembly impractical to wear. The camera was separated from an inspection module and fixed to safety goggles together with the wiring required for testing.
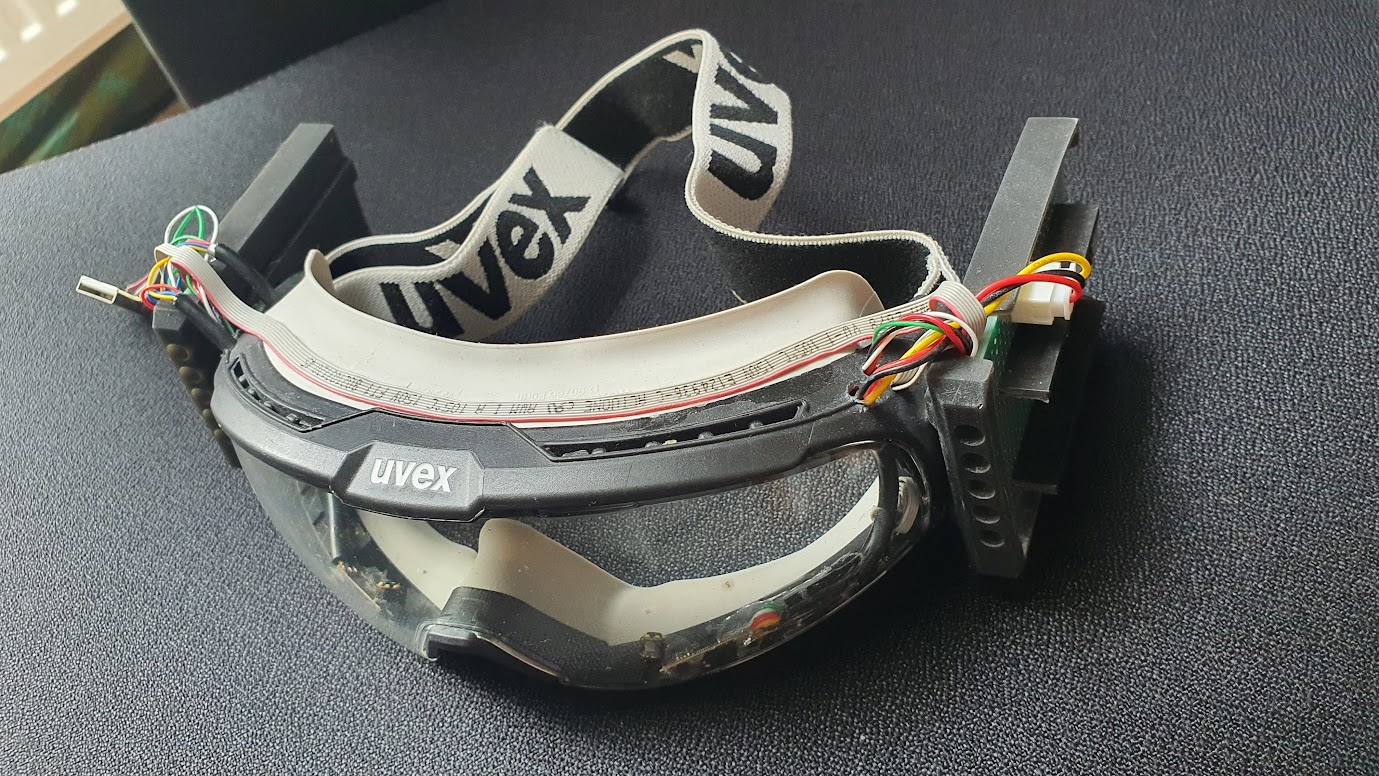
First physical assembly for testing camera placement, wiring and the feasibility of eye tracking.
What the project helped clarify
- which type of camera can be adapted for eye tracking in a compact assembly;
- how OpenCV processing can be linked to a physical control mechanism;
- which issues arise between the intention detected from the image and the actual movement of the joystick;
- the need for redundancy: emergency stop, radio control takeover and obstacle confirmation;
- the limits of a prototype built from available components before moving to dedicated hardware and enclosures.
Core component: miniature inspection camera
The camera module was removed from an inspection camera. Its small size made it possible to mount it on goggles and experiment with the position needed to capture gaze direction.
Status: exploratory project and integration exercise combining computer vision, Raspberry Pi, ESP32, servo control, miniature cameras and the mechanism of an electric wheelchair. The prototype was not developed into a final version, but it provided a practical basis for understanding the challenges of gaze-assisted control.
What these projects have in common
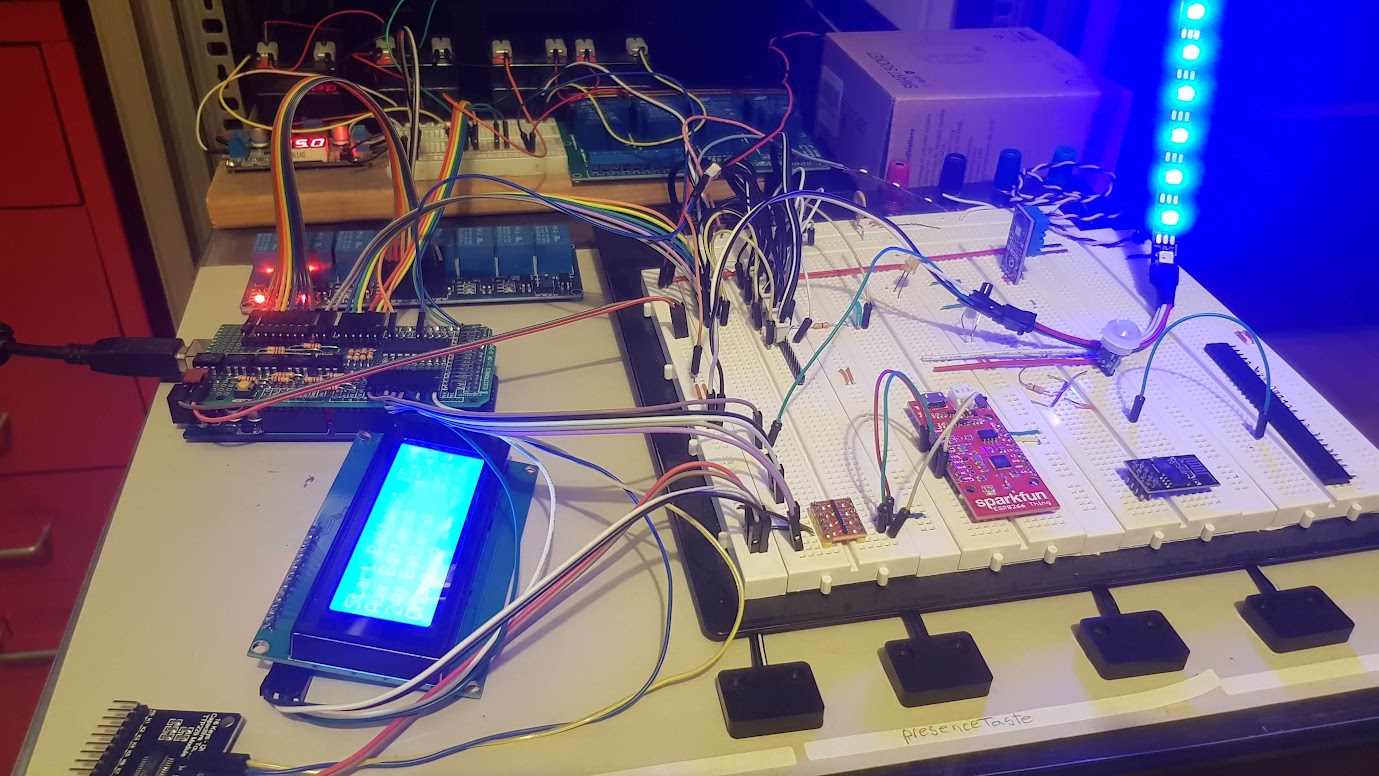
Prototypes of this kind pursue the same goal: turning an idea into a functional basis that can be tested, measured and improved. Sometimes the focus is on form, dimensions and visualisation. At other times it is on sensors, actuators, data, control or a simple working interface. In some cases, auxiliary physical elements, mounts or simple enclosures are included when they support testing and understanding.
Good prototyping does not mean building too much too early. It means clarifying enough to know whether the next step is worth taking.
How I approach projects like these
- I start with what needs to be validated, not with the ideal final version
- I choose a minimal but usable version
- I test in short cycles and iterate based on the results
- I connect hardware and software only as far as needed for real clarity
- I avoid complexity that does not support the test
- I leave a better foundation for continuation and extension
Collaboration and boundaries
In some prototypes I work directly on the logic, integration, basic electronics and the software required for testing. In others, complementary contributions may be needed depending on the project: industrial design, more advanced manufacturing, final enclosures, extended documentation or other specialisms. My role here is to take the idea into a functional and clear form, not to claim that every prototype becomes a complete finished product in the first step.
What this page shows
This page is not a list of finished products or a promise that every idea should immediately be pushed into a large development effort. It documents projects and working stages focused on testing, measurement, understanding and practical decision-making.
Do you have an idea that needs testing?
If you have an idea that needs validation through a prototype, send me the current situation and I will tell you what is worth testing first, what can be built as a minimal version and what should be left for the next stage.